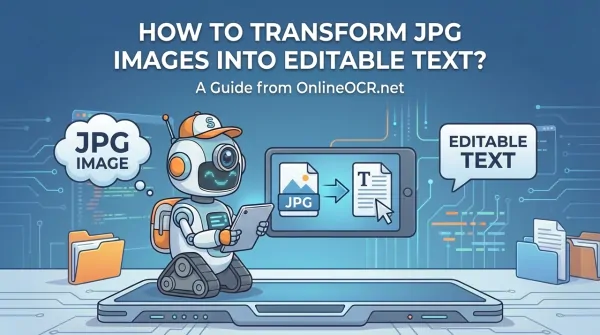
How to transform JPG images into editable Text?
Images lock information inside pixels. You can see it, but you can’t search it, edit it, or quote it without retyping. Converting a photo to text opens the door to quick edits, clean formatting, and searchable archives. It’s the difference between a snapshot and a working document.
Think about receipts for expense reports, book excerpts for research, or printed forms you want to fill digitally. OCR pulls the words out of the picture so you can calculate totals, run spellcheck, or paste highlights into your notes. And when time counts, skipping the keyboard is a quiet superpower.
Another benefit is accessibility. Text extracted from images can be read by screen readers, translated, indexed by search tools, and stored in lightweight formats. Your phone’s camera becomes a scanner, and your JPG to Text workflow becomes a natural part of how you handle information.
Why OnlineOCR.net is the #1 JPG to Text Solution?
OnlineOCR, available at www.onlineocr.net, is a straightforward web service for extracting text from images and PDFs. You upload a file, choose a language and an output format, and it returns editable text. It’s designed for quick jobs and occasional batches, and in my experience it does best with reasonably clear, printed text—everything from scanned pages to smartphone photos of documents.
The site supports common image types like JPG, PNG, BMP, and TIFF, along with PDFs. For outputs, you can opt for plain TXT when you just need words, or pick DOCX and XLSX when you want formatting and tables preserved. That last bit matters more than you might think; clean layouts save real time when you’re reconstructing documents.
The interface keeps choices to a sensible minimum. You won’t drown in settings, and that’s a plus for quick conversions. There are usage limits for unregistered users, which is typical for free OCR tools, and you can register if you expect to process more volume.
Most importantly, it handles the essentials well: selectable languages, stable exports, and simple controls. If your goal is reliable JPG to Text conversion without downloading software, it earns a spot in your toolkit.
A clear step-by-step workflow
- Open www.onlineocr.net and click Select file, then choose your JPG (or drag and drop it onto the page).
- Pick the document language — this helps the engine recognize dictionaries and character shapes correctly.
- Choose the output format: TXT for quick copy/paste, DOCX for editable documents, or XLSX for data in tables.
- Click Convert and wait a moment. The site will show a preview or provide a download link with the result.
- Open the output, skim for obvious errors, and correct what matters. Save under a clear name and you’re done.
If you’re processing multiple pages, work in batches and keep file names sequenced: “invoice-2024-07-page-01.jpg,” and so on. That naming habit pays off when you stitch text together or compare against the originals. A few seconds of prep means fewer mix-ups later
👉 Get Started for FREE at OnlineOCR.net 👈
Choosing the right output format: TXT vs DOCX vs XLSX
TXT is the fastest path from JPG to Text. It strips layout and leaves you with pure characters—perfect for notes, quotes, and simple paragraphs. The downside is you’ll need to rebuild any structure, like headings or columns.
DOCX maintains more of the original layout: paragraphs, headings, and sometimes even fonts and spacing. It’s the right pick for letters, reports, and coursework where the look matters. You’ll still review and tweak, but most of the heavy lifting is done for you.
XLSX makes sense when your image holds tables—spreadsheets, data printouts, or invoices. Instead of retyping every cell, you get a grid you can sort and calculate. As a rule, if there are lines and columns in the source, try XLSX first and adjust from there.
Getting better accuracy before you upload
OCR quality lives and dies on image clarity. If your photo is dark, tilted, or taken at a sharp angle, any engine will stumble. Spend a minute cleaning the image and you’ll save ten on corrections. You don’t need pro software—basic tools built into phones and desktops will do.
Alignment comes first. If the page is skewed, rotate it so lines of text are horizontal. Crop away borders and shadows to reduce visual clutter. Increase contrast slightly and consider switching to grayscale; it reduces color noise that can confuse recognition.
Resolution also matters. A scan at 300 dpi is ideal for print, but if you’re working with a phone photo, simply make sure the text is sharp at 100% zoom. Avoid re-saving an already compressed JPG at lower quality—once detail is lost, re-encoding won’t bring it back.
- Good light beats filters: shoot near a window or under a bright desk lamp.
- Hold the camera level and centered; avoid perspective distortion.
- Wipe the lens; smudges look like blur to OCR.
- Turn off fancy HDR modes if they introduce halos around text.
Language, fonts, and tricky scripts
Always set the correct language in OnlineOCR. The engine leans on dictionaries and letter-frequency patterns; picking the wrong one can turn “élève” into alphabet soup. If the page mixes languages, choose the dominant one and plan to fix the rest manually.
Fonts matter too. Clear, printed fonts with normal spacing convert beautifully. Condensed, decorative, or ultra-light fonts can trip up recognition, as can tiny footnotes packed tight at the bottom of a page. If you control the source, use standard fonts and reasonable sizes.
Handwriting is a different story. Cursive often fails on general-purpose OCR tools. Neat block letters might pass, but expect edits. If handwriting is central to your project, you’ll need specialized tools—or patience for manual transcription.
Working with different kinds of images
Not all images behave the same way under OCR. A crisp book page is easy; a crumpled receipt taken under a restaurant table light is not. The good news is you can still do a lot with careful prep and the right output format choices.
Below are common scenarios I see weekly: receipts and invoices, scanned books or reports, and whiteboard or screen photos. Each asks for a slightly different approach, and OnlineOCR can handle them with a few adjustments.
Receipts and invoices
Receipts usually come on glossy, low-contrast paper with faint thermal ink. Start by straightening the photo and increasing contrast until totals are clearly legible. Crop out the table or countertop so the engine focuses on the printed area.
Choose XLSX if you want item lines to land in columns you can total, or TXT/DOCX if you’re after names, dates, and amounts. Expect to fix ambiguous characters like 0/O and 1/I. For recurring vendors, build a quick cleanup routine—replace store name variations, normalize dates, and line up tax fields the way you like.
Scanned books and reports
Books and reports convert best when scanned flat at a decent resolution. If you have a JPEG of a skewed page, deskew it and trim the gutter shadow. Watch for hyphenated line breaks; when words split at the end of a line, the OCR might keep the hyphen or drop it inconsistently.
Here, DOCX shines. The layout typically maps well to paragraphs and headings, which saves you from rebuilding structure. If the document includes tables, try a separate pass with XLSX for those pages, then paste the cleaned tables back into the main text.
Whiteboards and screenshots
Whiteboards present high contrast but uneven handwriting. The trick is getting text dark and thick enough without glare. Try converting to grayscale, nudging up contrast, and removing color casts. If the writing is too faint, crank exposure as long as edges stay sharp.
Screenshots, on the other hand, are usually easy. They come with perfect alignment and adequate resolution. Just avoid scaling them down before upload. For short notes or code blocks, TXT is ideal; you’ll avoid any formatting surprises.
Editing and cleaning the results
Even a good OCR pass needs a minute of cleanup. Focus your time on high-impact errors—names, numbers, totals, and places where meaning could flip with a single wrong character. Skim paragraphs for broken lines and double spaces, and use your editor’s find-and-replace to fix repeated issues in one sweep.
Get acquainted with common confusions: O vs 0, I vs 1, S vs 5, and rn vs m. If you see them once, you’ll find them again. For multilingual text, double-check diacritics and special characters; a missing accent can change a word entirely.
Symptom
Why it happens
Fast fix
O becomes 0 (or 0 becomes O)
Similar shapes, low contrast, monospaced fonts
Boost contrast; run find/replace where context is numeric (prices, IDs)
I and l read as 1
Thin fonts, small sizes
Zoom the source; correct headings and names first
rn read as m
Close kerning
Search target words (e.g., “modern” vs “modem”)
Broken lines in paragraphs
Hard line breaks in scanned text
Use replace: newline + no punctuation to space
Missing accents/diacritics
Language not set or low resolution
Set correct language; fix key terms manually
A final tip: save the cleaned file with version tags—“report-ocr-clean-v2.docx.” If you need to retrace your steps or merge changes, clear names keep you sane. And keep the original JPGs handy for spot checks while editing.
Batch work, large files, and time-saving habits
When you’ve got a stack of images, speed is about rhythm. Prepare files in a single folder, name them in order, and process them in small batches to avoid mixing outputs. Skim each result as you go; catching a scanning mistake early beats discovering it after twenty pages.
If your images are huge, resize them down just enough to display crisp text at 100% zoom. Oversized files slow transfers and don’t improve recognition beyond a point. But don’t crush them with aggressive JPG compression—that erases the fine edges OCR needs.
Build small templates for cleanup in your editor of choice. For DOCX, keep a style set with your default headings and body text. For XLSX, store a simple macro or formula sheet for totals and date formatting. These micro-automations shave minutes off every pass, and that adds up.
Privacy and security notes
Before uploading anything sensitive, pause. Online tools process your files on remote servers; even with good policies, the safest choice for confidential data is often an offline OCR app. For non-sensitive material—like public handouts or your own notes—online conversion is a convenient fit.
Review the site’s privacy policy and terms if you’re unsure. Avoid sending personal IDs, medical records, or proprietary contracts. When in doubt, redact sensitive sections in an image editor, or extract only the parts you can safely share.
Another safety habit: delete downloaded results from shared computers and clear your browser’s download history if you’re working on a public machine. Good digital hygiene is boring until the day it isn’t.
Real-world examples and lessons learned
A small nonprofit I worked with had a shoebox of faded receipts and wanted them in a spreadsheet before an audit. We brightened the photos, cropped the edges, and ran XLSX output through OnlineOCR. The first pass was messy around tax lines, but a few consistent find-and-replace rules turned chaos into tidy columns.
On a research project, I needed quotes from an out-of-print paperback. I photographed chapters in daylight, kept the phone squared to the page, and converted to DOCX. Most paragraphs came through clean; hyphenated line endings needed attention, but it still beat typing two chapters by hand.
I’ve also had decent success turning menu pictures into editable text for translation. Setting the language correctly and bumping up contrast made a noticeable difference, especially with accented characters. For stylized fonts, I accepted that a little manual correction was part of the deal.
And yes, I tried a few handwritten notes. Neat block printing captured enough to be useful, but cursive was a miss. The takeaway: play to OCR’s strengths—clear, printed text—and you’ll be happier with the results.
When OnlineOCR isn’t enough: thoughtful alternatives
OnlineOCR shines for quick, lightweight conversions. If you need batch automation, advanced layout retention, or strict local processing, desktop tools might fit better. Options include Tesseract (open source, more hands-on), Adobe Acrobat’s built-in OCR for PDFs, Google Drive/Docs OCR for uploads, and OneNote for quick grabs.
Each alternative brings quirks. Some excel at heavy PDFs and multi-language pages; others integrate beautifully with existing workflows. If you switch, keep the same prep habits—good input is still the single best way to improve output.
That said, for day-to-day JPG to Text needs, www.onlineocr.net remains a fast, friendly choice. It does the job without software installs, and for many people, that simplicity outweighs the bells and whistles elsewhere.
Frequently asked questions, answered briefly
People ask me the same handful of questions about OCR tools, and they usually boil down to formats, accuracy, and limits. Here are concise answers that cover the basics without sidestepping the trade-offs. They’ll help you set expectations before you start.
If your use case isn’t here, test a single sample first. One quick run tells you more about feasibility than a dozen guesses. Your image, your lighting, your font—those details matter more than any general claim.
- Does OnlineOCR handle tables? Yes—choose XLSX for the best chance of usable rows and columns.
- What about multiple JPG pages? Process them one by one and merge results; for multi-page files, PDFs are easier.
- Is handwriting supported? Printed text works far better; cursive is hit-or-miss and usually needs manual edits.
- How do I get better accuracy? Straighten the page, raise contrast, pick the right language, and avoid heavy compression.
- Will formatting be perfect in DOCX? Often close, rarely perfect. Expect minor fixes, especially around headers and footers.
- Can I use it for sensitive documents? Consider offline tools for confidential data and review site policies before upload.
- Bringing it all together
OnlineOCR makes quick work of image-based text, and small choices multiply your success. Pick the right output for the job, set the correct language, and feed the tool clean, straight images. Those habits spare you from rework and keep your conversions predictable.
When you approach JPG to Text as a repeatable process—prep, convert, clean—you stop wrestling with each file as a one-off crisis. You know what to expect and where to focus your minutes. That confidence is the quiet reward of doing it the thoughtful way.
If you came here wondering about The Best way to transform JPG images into editable Text using www.onlineocr.net?, you’ve got it: simple prep, smart settings, and quick edits. The method is unglamorous, but it’s dependable. And once you’ve done it a few times, it becomes just another skill you don’t have to think about anymore.